
Topflight Stamps - Thanks a Chameleon

    Hi Everyone,

It's Topflight Stamps day! 
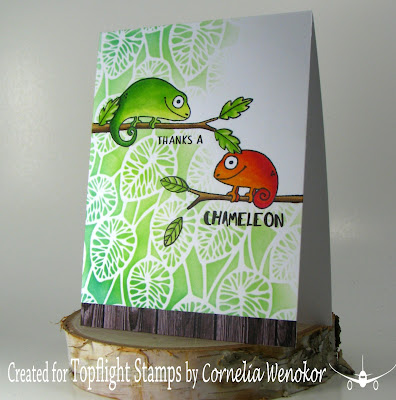
This week we are featuring stamps by Jane's Doodles. 

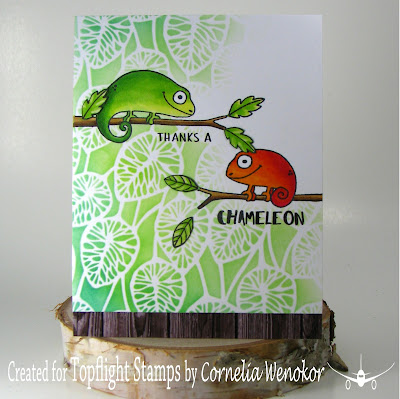
I first stamped the Chameleons and colored them with Copics. Stenciled the background. Added the sentiment. Also added some leaves, some of which I cut out and others I just stamped onto the card. Trimmed the card and added a strip of designer paper at the bottom.
I hope you liked this. Thanks for visiting. 
See you next week with more Topflight Stamps inspiration.
And here are the stamp supplies I used: 

Chameleon            Elegance
 
Blender Brushes                  Prism Dye Ink Pads


Linking up with:


Comments

Flo said…
Der Hintergrund gefällt mir d´sehr gut, Das grüne Chamäleon muss sich noch etwas besser an den Hintergrund anpassen, damit es nicht zu Schaden kommt :-))
Und das rote - na ja, das wird sich auch noch tarnen, denke ich.
Sehr schön coloriert hast Du die Beiden.
LG Flo
conil said…
Those beautifully colored chameleons are darling. And the stenciling is perfect for them. Great card.
Darnell said…
I love how you combine beautiful stenciling and coloring with a funny punny sediment! Nobody does that as well as you, Cornelia! Have a great weekend! Hugs, Darnell

Popular posts from this blog

Easter Egg and Bunny

Hi Everyone, I made a bunch of Easter cards, after all its little more than one month and I need to send them out in time... You see, they are all similar - using both the die cut and the negative, that I cut from a die cut egg. The cute bunnies got their yearly appearance - they are from Impression Obsession. the egg is by Lifestyle Crafts. The sentiment is by Papertrey. And here are bigger photos from this set: Linking up with Creative with Stamps - Easter The Paper Players - die cutting Die Cut Divas - animals Happy Little Stampers - anything goes with dies

STAMPlorations Coffee Mini Hop

Hi Everyone, I am so happy to be part of STAMPlorations mini hop  and Spring Lovers Coffee hop featuring Becca's awesome new set! I immediately fell in love with it! You probably have seen my other card I made with this set, if not, you can see it HERE . My supplies:    Bunnies'N Beans , Latte stencil I sponged the ARTplorations stencil and colored the bunny with Copics and fuzzy cut him. Added Washi tape. The other new released set is: Always Tea Time Hop over to STAMPlorations to see some inspiration cards with both sets from your oh so talented DT group! And don't forget to leave a comment - one winner will get the bunnies, another winner will get tea time! The winners will be announced March 27! The sets are not discounted BUT we have a 15% off coupon code for everything in the store, including these stamps, and it's good until March 2 . Use code SPRINGCLBH Also linking up with: Simon Says Wednesday challenge

Mirror Image Stamping with So Suzy and the MISTI

Hi Everyone, I am so happy to be part of this wonderful event - the collaboration between So Suzy and the MISTI from My Sweet Petunia doing mirror image stamping.  This event is going on for the ENTIRE  MONTH! We are demonstrating the  Mirror Image Stamp    which coordinates with the Misti Stamping Tool! All month long, different bloggers will post a card using the  Mirror Image Stamp .  In my tutorial today, I will show you how use the  Mirror Image Stamp  on your cards. You can basically double your stamp supplies that way! The  mirror image stamp  is  a 4.25" x 5.5" piece of red rubber with no foam backing. So much larger than the other mirror image stamps out there and therefore much more useful! Mirror Image stamp ,  Two Cats in a Tree If you want a video tutorial on how to do this I can highly recommend you watch THIS VIDEO on youtube. Explains it all in very little time! Or you can see the same thing on my photo tutorial. With mirror