
Topflight Stamps - Going to the Beach with Crafty Individuals

 Hi Everyone,

This week it's anything goes on the Topflight blog.  Before summer is over I wanted to sneak in a beach card.
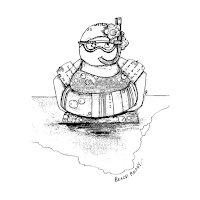
 I stamped the lady and seagull with Versafine ink onto water color paper. Colored with water colors. Trimmed my panel and mounted it onto a page of patterned paper, that I brushed with blue distress ink to make it match the beach theme a bit better. Stamped the beach and boats signs onto patterned paper and cut them out. Added them. 
I hope you liked this. Thanks for visiting. 
See you next week with more Topflight Stamps inspiration.
And here are the stamp supplies I used: 
Linking up with:
Day of the Month Card Club - National Beach Day


Comments

papierelle said…
Gerade nimmt der Sommer bei uns noch mal richtig Fahrt auf, wir bekommen heute 35°C. Perfekt für den Strand, besonders wenn man so gut ausgerüstet ist, wie Deine Schönheit auf der Karte. Wieder mal eine geniale Karte und ich freue mich sehr, dass Du sie bei DotMCC zeigst. LG Gundi
Ink Art Designs said…
I use to live by the beach, so this brings back many happy memories ... even with the body LOL.
Great card x

Popular posts from this blog

Mirror Image Stamping with So Suzy and the MISTI

Hi Everyone, I am so happy to be part of this wonderful event - the collaboration between So Suzy and the MISTI from My Sweet Petunia doing mirror image stamping.  This event is going on for the ENTIRE  MONTH! We are demonstrating the  Mirror Image Stamp    which coordinates with the Misti Stamping Tool! All month long, different bloggers will post a card using the  Mirror Image Stamp .  In my tutorial today, I will show you how use the  Mirror Image Stamp  on your cards. You can basically double your stamp supplies that way! The  mirror image stamp  is  a 4.25" x 5.5" piece of red rubber with no foam backing. So much larger than the other mirror image stamps out there and therefore much more useful! Mirror Image stamp ,  Two Cats in a Tree If you want a video tutorial on how to do this I can highly recommend you watch THIS VIDEO on youtube. Explains it all in very little time! Or you can see the...

Easter Egg and Bunny

Hi Everyone, I made a bunch of Easter cards, after all its little more than one month and I need to send them out in time... You see, they are all similar - using both the die cut and the negative, that I cut from a die cut egg. The cute bunnies got their yearly appearance - they are from Impression Obsession. the egg is by Lifestyle Crafts. The sentiment is by Papertrey. And here are bigger photos from this set: Linking up with Creative with Stamps - Easter The Paper Players - die cutting Die Cut Divas - animals Happy Little Stampers - anything goes with dies

Combined So Suzy and The Ton Blog Hop

Hi Everyone, I am sooooo excited to be part of this amazing event - a combined hop between So Suzy Stamps and The Ton! I have been eyeing The Ton stamps and dies for quite a while - they are just gorgeous! And So Suzy - well you have seen their stamps on my blog - they are simply fabulous! I also love that they are made from rubber - its different stamping with them. Its much better for generational stamping and they don't stick to your paper when you use your Misti. You may have arrived from the fabulous  Eunji - its a hard act to follow her.... I got those gorgeous  Peonies Dies  from The Ton and die cut them with water color paper. Spritzed Dylusion inks on a sheet of plastic and dipped the dies into the colors. Mounted them onto black card stock. Added the So Suzy Birthday sentiment - heat embossed in white. Lastly I added a strip of envelope liner paper at the bottom. Here are my supplies: So Suzy Birthday sentiment ,  Peo...