Striped Thanks

Hi Everyone,

I am slowly getting back into card making after coming back from vacation and 1 1/2 grueling weeks at work. How nice to have some time again and not being completely exhausted!
Inspired by all the Little Things caught my attention - such a fun inspiration picture!


You see how I got inspired - mainly by the black and white striped raincoat, the black umbrella and some pink splatters - its after all raining!


I immediately thought of my iStencil collection when I saw the picture and picked one called PacMan Stacks that I really like. I added pink splatters. The thanks is by CUTplorations and I die cut it twice.


I took one of the rows and masked off the rest and sponged with black ink. I then took the opposite one and lined it up with the first row and did the same thing. Added some sequins and a left over strip of water colored paper.


I do need a lot of thank you cards right now, so you are going to see more of them soon.

And just in case you like that die - use code STAMPGIRLCORNELIA
to get 20% off on all stamps, stencils, and dies. on all regular- and sale-priced items in the store.

Also linking up with:

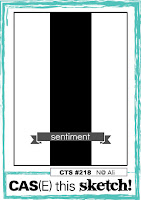
CAS(E) this Sketch - just turned the sketch on the side


Happy Stenciling!

Comments

LeeAnn McKinney said…
WOW, this is great Cornelia.
Aileen said…
Fabulous way to use the stencil, as soon as I saw the card I saw your inspiration. Perfect
Sheri Gilson said…
Fabulous take on the inspiration! Thank you so much for playing along with us at Inspired By All The Little Things!
Kim Heggins said…
Fabulous card...just amazing!
BożenA said…
I love all your cards made using the i'Stencil template. They are always amazing, so futuristic. Excellent inspiration.
Hugs,
BozenA
Karen Day said…
Wow, love how you used the stencils!! Thanks for joining us at Inspired By All The Little Things this week :o)
Leigh Penner said…
This is so cool! Fabulous take on the inspiration photo and on the sketch!
Michelle said…
Very, very cool, Cornelia! Thanks for joining us at CAS(E) This Sketch!
Jane said…
Such an amazing stencil and so different from the usual. Looks fabulous Cornelai. Thanks for playing at AAA Cards.
Nora Noll said…
Such an amazing stencil!! I love the black and white with the splashes of color. Totally amazing card!!
papierelle said…
Toller Effekt, schaut cool aus!!
Mac Mable said…
Stunning, eye catching and perfect take on the photo x
Flo said…
Diese Stencil(s) sind wirklich einmalig schön und zaubern immer wieder andere und tolle Karten.
Die Spritzer geben dem Ganzen noch den entsprechenden Pepp.
Liebe Grüße
Monika Reeck said…
wooowwza that rain coat and your card??
its similar
and you are so clever using that stamp as raincoat to the inspiration
great great idea...
and yes its a great stencil you own Cornelia
happy you are come back from Vacation and not exhausted anymore
ich bin bei Arbeit suchen wieder
also bin zu Hause since 1 March
so have much time to do DT cards...
see you around Suesse
hugs
Monika
Sazzle Dazzle said…
Super eye-catching, bold and fabulous Cornelia. That's an awesome stencil and you've showcased it perfectly. Great colour combo and thanks for playing with us at AAA Cards this week
Aileen said…
Stand out on Inspired you clever thing you. Congrats knew it was a winner
Anita in France said…
Cool, crisp, stylish ... and so clever, Cornelia ... what a stunner! Congratulations on your shout out at IBATLT! Hugs, Anita :)
Chrissy Larson said…
Very cool and modern!! Awesome!
conil said…
Truth is...when I saw this little number I went all goggley-eyed. My admiration for your work simply grows and grows each time I see it. There are no words for this one except a deep heavy sigh meaning, "why didn't I think of that".

Popular posts from this blog

Easter Egg and Bunny

Hi Everyone, I made a bunch of Easter cards, after all its little more than one month and I need to send them out in time... You see, they are all similar - using both the die cut and the negative, that I cut from a die cut egg. The cute bunnies got their yearly appearance - they are from Impression Obsession. the egg is by Lifestyle Crafts. The sentiment is by Papertrey. And here are bigger photos from this set: Linking up with Creative with Stamps - Easter The Paper Players - die cutting Die Cut Divas - animals Happy Little Stampers - anything goes with dies

Dynamic Duos combined with CAS Colours and Sketches

I am getting the hang of combining challenges....not sure if that's good or bad... In the past I would just put all my "creative energy" into one challenge and then just link up with others, if the card just happened to fit...but now I do that on purpose. Well, I'll see how it goes....                           Anyhow here is the card that came out of this: I did not want to add a sentiment - I 'll add it later, when I know who will get it. And here is a close -up: Challenges: Dynamic Duos CAS Colours and Sketches Addicted to Stamps and More Amusing Challenges Materials: Papertrey Background Basics: Super Stripes, Memory Box Chloe Stem die. --X-- Card for Maddy: You may know already about  Maddy ,  who  was diagnosed with Acute Myeloid Leukemia and went through chemotherapy treatment followed by a stem cell transplant from her (then) fifteen year old sister Melanie.  She now has a relapse and this car

Mirror Image Stamping with So Suzy and the MISTI

Hi Everyone, I am so happy to be part of this wonderful event - the collaboration between So Suzy and the MISTI from My Sweet Petunia doing mirror image stamping.  This event is going on for the ENTIRE  MONTH! We are demonstrating the  Mirror Image Stamp    which coordinates with the Misti Stamping Tool! All month long, different bloggers will post a card using the  Mirror Image Stamp .  In my tutorial today, I will show you how use the  Mirror Image Stamp  on your cards. You can basically double your stamp supplies that way! The  mirror image stamp  is  a 4.25" x 5.5" piece of red rubber with no foam backing. So much larger than the other mirror image stamps out there and therefore much more useful! Mirror Image stamp ,  Two Cats in a Tree If you want a video tutorial on how to do this I can highly recommend you watch THIS VIDEO on youtube. Explains it all in very little time! Or you can see the same thing on my photo tutorial. With mirror