
Make It Monday #16 - Chalk and Stamps with Impression Plates

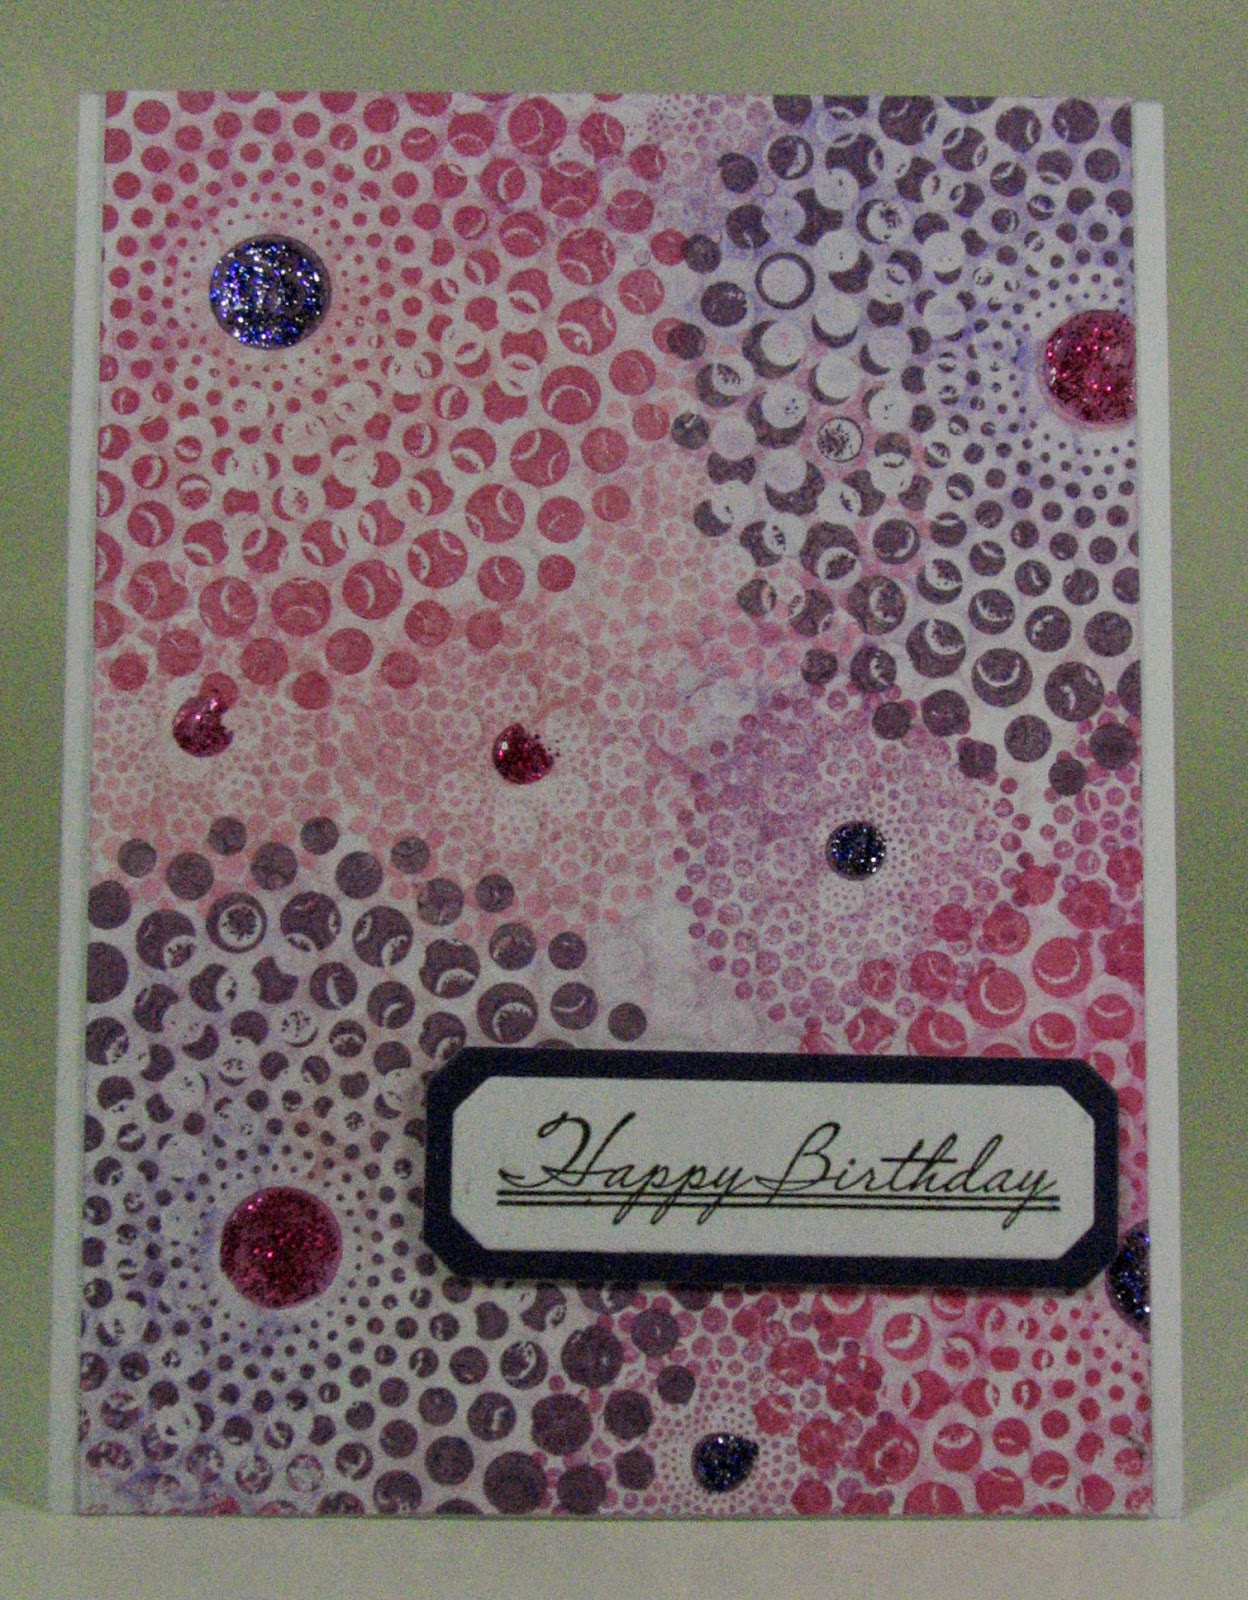
 I made this card fo rthe Make It Monday #16  from Papertrey. The theme issCombining Chalk and Stamps with Impression Plates. Melissa explaines in a fabulous video how to do that. I causes this great effect and I love how this card turned out.
Papertrey 
 I took that polka dot embossing plate by Papertrey and added chalk in various shades of pink and purple. I then stamped on it with the Dot Spot set. The sentiment is from the Papertrey set Cutting Garden. The die cuts I used fro the sentiment are also by PTI.


I added some Stickles. Not sure why, since the card looked pretty good without it. Here are some more shots to show you the texture of this card better:


I am also submitting this card to the AAA challenge. Of course I had the colors in mind when I chose them for this card. 


And lastly this card will join the Snippets Playground - sentiment papers taken from my ever growing snippets pile...


Comments

Cathy said…
Fantastic card Cornelia. Love this textured effect and such a great colour combo, Cathy x
Deepti said…
This is gorgeous :) I guess I will have to try this !
Kim Heggins said…
Cornelia...I love, love your card! really wishing I had hung onto my chalks. Love that design and the colors, just stunning!
Linda Beeson said…
Wow, that great effect is amazing, love how you carried it out. So glad you played along at AAA Cards
papierelle said…
Das ist wirklich ei ganz toller Effekt, gefällt mir sehr gut Deine Karte!!
LG Gundi
Jane said…
Love this all over embossed background and the addition of purple to the pink is just perfect. Thanks for playing at AAA Cards.
Hannelie said…
That added texture adds so much Cornelia!
And... I LOVE the colors!
Thanks so much for linking up at AAA challenge!
Di said…
Oooer, how clever Cornelia! LOVE the colours you used and the technique is certainly one I'll be trying here.

Hugs, Di xx
Oh Neat! I gotta try this! Your technique came out fabulous and stylish. So happy you've shared it with AAA Cards, thank you. Cheers, Victoria Lavender
Angela said…
What a super gorgeous card you've made with that technique, Cornelia! I'm especially happy you've joined our challenge at AAA Cards!
Nancy Penir said…
Beautiful results, Cornelia, and I love the stickles! Adds a bit of bling!
Anita in France said…
Feeling the need to have a touch and feel facility on my screen with all this gorgeous texture, Cornelia ... this is fantastic! Anita :)
Vicki Dutcher said…
Awesome end result! Thanks for joining in at AAA~

ps - Thanks for the BIC heads up
Manuela said…
ebenfalls super, die Technik ist echt klasse. Damit wird die Karte direkt zum Blickfang.
Sue said…
Gorgeous effects! Stunning card :)
Barb Ghig said…
Wow! You did an amazing job on this technique, Cornelia! The polka dot embossing plate was such a great choice, and I love the fun colors you chose...Really beautiful card!
G Peplow said…
Beautiful card, I love all the texture behind all the circles, great job :D x

Popular posts from this blog

Katzelkraft - Stampotique Raven

Hi Everyone, Do you know that   Katzelkraft has aquired Stampotique stamps? This fun raven is designed by Daniel Torrente (#6314). I used an old background from my stashs.  I stamped the bird and colored it with alcohol ink markers.  I brushed distrss ink onto the background and added some pattern with the   Mandala Magic stencil  from Funky Fossil Designs.I used one of the border stamps on the left for more interest.  Stamped the sentiment  and doodled a frame around the sentiment.Added a googly eye to the bird and drew in some eye lashes.  The stamps I used are from the following sets: Spiral Borders - KTZ286,  Whatchamacallit  - KTZ276  (FRANCE) Spiral Borders  - KTZ286 , Whatchamacallit  - KTZ276 (USA) Hope you liked this - I'll be back next Wednesday with more Katzelkraft inspiration.  Thanks for visiting! Happy Stamping! Linking up with: Simon Says Wednesday challenge  - fur or feathers

Suzanne's Surprise Blog Hop

Hi Everyone, I have a very special card for you today - a birthday card for Suzanne, the owner and talented force behind So Suzy Stamps! And we are celebrating this wonderful occasion with a special blog hop! You may have arrived from the wonderful Giada , our Italian contingent :) HAPPY BIRTHDAY Suzanne! I used the Blowing Butterflies  (heat embossed in gold)  and the Birthday Wishes  to create my card. I cut myself a gold frame from glitter paper and added a water color wash. I opened the frame on the side to have the butterflies and color spill out. Added lots of splatters and the heat embossed sentiment Your next stop on the hop is the talented Henriette - you are going to love her card! And just in case you get lost - below are all the participants listed. You even can get lucky and win a $20 gift certificate for So Suzy Stamps - sponsored by Justine and a  Bunkie Bag from Simply Charming Everyday, but you have to le...

Combined So Suzy and The Ton Blog Hop

Hi Everyone, I am sooooo excited to be part of this amazing event - a combined hop between So Suzy Stamps and The Ton! I have been eyeing The Ton stamps and dies for quite a while - they are just gorgeous! And So Suzy - well you have seen their stamps on my blog - they are simply fabulous! I also love that they are made from rubber - its different stamping with them. Its much better for generational stamping and they don't stick to your paper when you use your Misti. You may have arrived from the fabulous  Eunji - its a hard act to follow her.... I got those gorgeous  Peonies Dies  from The Ton and die cut them with water color paper. Spritzed Dylusion inks on a sheet of plastic and dipped the dies into the colors. Mounted them onto black card stock. Added the So Suzy Birthday sentiment - heat embossed in white. Lastly I added a strip of envelope liner paper at the bottom. Here are my supplies: So Suzy Birthday sentiment ,  Peo...