
STAMPlorations May Challenge - Stamps and Flowers

Hello Everybody, its time again for another challenge at
 - very appropriate for this time of the year - its STAMPS and FLOWERS!


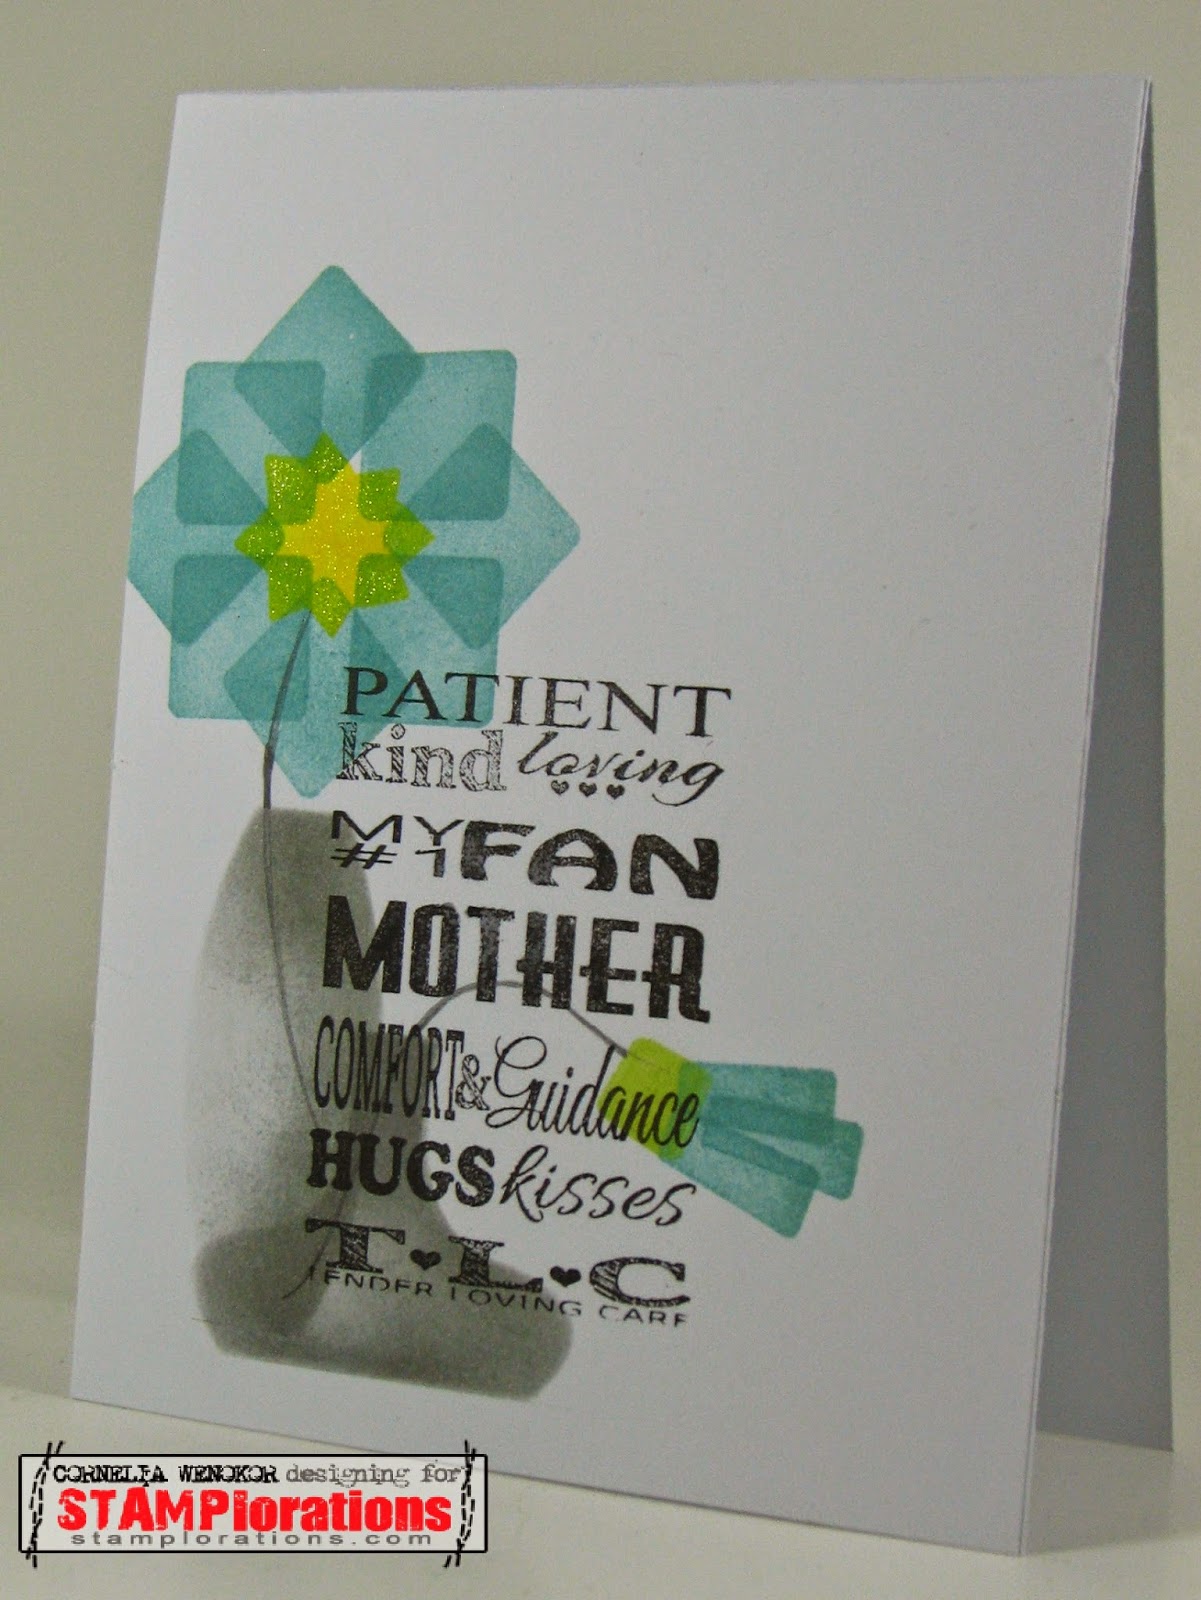
I also used my self made stencil that I have also used for THIS card, made out of vase dies from PTI. It should come to no surprise that the Retro Mod shapes is my absolute favorite set. I can't think of a more versatile set than that..... I just love playing around with those shapes....

We have a fabulous guest designer this month - its Sue from Cards by Q - so glad you could join us this month, Sue! And of course we have fantastic cards by our DT - I am sure they will inspire you! Come on over and see for yourself!


And if this is not enticing enough - here is our May Prize:
Cloud9 Design Epoxy Accent Stickers, K&Co. Blue Awning Die-Cut Cardstock Tags, Elle's Studio Day to Day Tabs,Bella Blvd Crochet Flowers, The Card Co. Funky Lipstick Paper Flowers, and Heidi Grace Printed Flowers


The challenge ends May 31, the winner will be announced June 5. 
I hope to see you there!

Challenges:
One Layer Simplicity challenge - Fabulous Flowers
Simon Says Wednesday challenge - Anything Goes
Colour me...!  - Anything goes - up to 5 colors


Comments

Hannelie said…
I love the way you built the flower!
Fabulous card!
Shery Russ said…
What a creative way to use the Retro Mod Shapes set, Cornelia! I love the modern look of your flowers and vase! GREAT one layer card!
Desire Fourie said…
Stunning stamping going on here.
Hugs
Desíre
{Doing Life – my personal blog}
Nonni said…
Very inventive and contemporary, what a cool card! xx
Laura Sterckx said…
This is so pretty. Love all the beautiful stamping and the colors. Thanks so much for joining us at the Simon Says Wednesday Challenge Blog! :)
sandie said…
very cool way to make the flower and so stunning x
Debra James said…
Great idea to make a flower from those shapes- such a wonderful card. Very clever.
Vicki Dutcher said…
Very clever on making your flower!!
maria f. said…
YEP, gotta get me those mod shapes. Can't wait to see your white on kraft beauty show up in blogland ;)
Anita in France said…
Very cool, Cornelia ... love how you used those fab graphic shapes to make such a wonderful bloom! Anita :)
Unknown said…
Seriously cool how you have created the flower and pots out of shapes!!! NEATO :) Thanks so much for sharing with us at Colour Me...! this week, we sure hope we will see you again soon!!!
shirley-bee said…
This is inspired, Cornelia!
Rosemary said…
totally cool card... love that you created everything using simple shapes!! thanks so much for playing along with Colour Me!
Kim Heggins said…
Wow...what a card! You are just amazing Cornelia.
Rosmarie said…
Ja, sehr oft kann man mit den einfachsten Dingen wunderschöne Sachen zaubern! Eine tolle Karte ist dir da wieder gelungen!
Mal sehen ob mich die liebe Zeit diesmal mitmachen lässt.....
LG Rosi
Anonymous said…
Wow Cornelia. This is one amazing flower. You really make some stunning use of the Retro Mod Shapes! Have a great day! hugs Monika xxx
Darnell said…
Incredible OLC, Cornelia! I love every detail. You have created so much depth!! Hugs, Darnell
Sue VanDeVusse said…
Love how you built the flower from the Retro Mod Shapes! Very cool making your own vase stencil. Love the arrangement on this.

Popular posts from this blog

Katzelkraft - Stampotique Raven

Hi Everyone, Do you know that   Katzelkraft has aquired Stampotique stamps? This fun raven is designed by Daniel Torrente (#6314). I used an old background from my stashs.  I stamped the bird and colored it with alcohol ink markers.  I brushed distrss ink onto the background and added some pattern with the   Mandala Magic stencil  from Funky Fossil Designs.I used one of the border stamps on the left for more interest.  Stamped the sentiment  and doodled a frame around the sentiment.Added a googly eye to the bird and drew in some eye lashes.  The stamps I used are from the following sets: Spiral Borders - KTZ286,  Whatchamacallit  - KTZ276  (FRANCE) Spiral Borders  - KTZ286 , Whatchamacallit  - KTZ276 (USA) Hope you liked this - I'll be back next Wednesday with more Katzelkraft inspiration.  Thanks for visiting! Happy Stamping! Linking up with: Simon Says Wednesday challenge  - fur or feathers

Suzanne's Surprise Blog Hop

Hi Everyone, I have a very special card for you today - a birthday card for Suzanne, the owner and talented force behind So Suzy Stamps! And we are celebrating this wonderful occasion with a special blog hop! You may have arrived from the wonderful Giada , our Italian contingent :) HAPPY BIRTHDAY Suzanne! I used the Blowing Butterflies  (heat embossed in gold)  and the Birthday Wishes  to create my card. I cut myself a gold frame from glitter paper and added a water color wash. I opened the frame on the side to have the butterflies and color spill out. Added lots of splatters and the heat embossed sentiment Your next stop on the hop is the talented Henriette - you are going to love her card! And just in case you get lost - below are all the participants listed. You even can get lucky and win a $20 gift certificate for So Suzy Stamps - sponsored by Justine and a  Bunkie Bag from Simply Charming Everyday, but you have to le...

Combined So Suzy and The Ton Blog Hop

Hi Everyone, I am sooooo excited to be part of this amazing event - a combined hop between So Suzy Stamps and The Ton! I have been eyeing The Ton stamps and dies for quite a while - they are just gorgeous! And So Suzy - well you have seen their stamps on my blog - they are simply fabulous! I also love that they are made from rubber - its different stamping with them. Its much better for generational stamping and they don't stick to your paper when you use your Misti. You may have arrived from the fabulous  Eunji - its a hard act to follow her.... I got those gorgeous  Peonies Dies  from The Ton and die cut them with water color paper. Spritzed Dylusion inks on a sheet of plastic and dipped the dies into the colors. Mounted them onto black card stock. Added the So Suzy Birthday sentiment - heat embossed in white. Lastly I added a strip of envelope liner paper at the bottom. Here are my supplies: So Suzy Birthday sentiment ,  Peo...