
CAS(E) this Sketch #62

I have not played at CAS(E) this sketch in a long time.....But here I am with  a card for it:


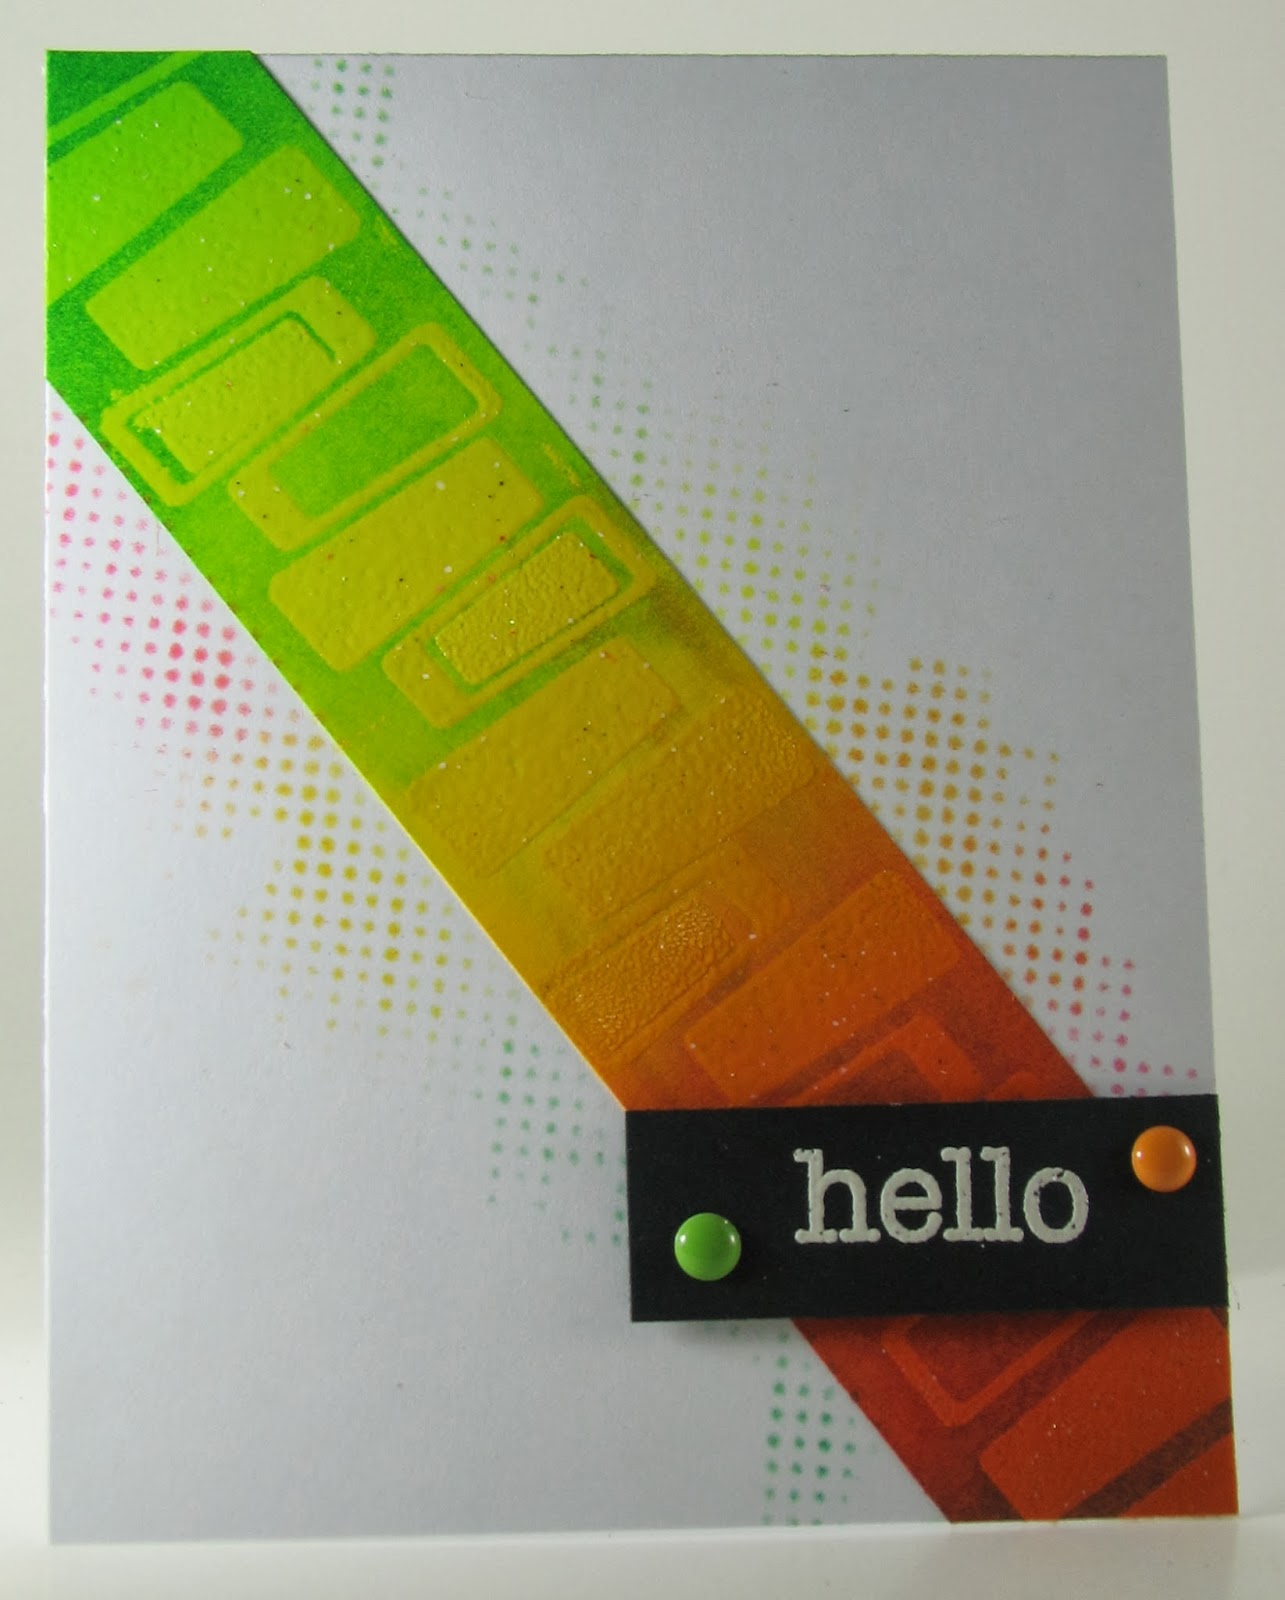
 I used the STAMPlorations set Retro Mod Shapes to make this card. I stamped with Versamark and heat embossed the paper strip with clear embossing powder and then sponged in green and reds.


The dots on the side are a TCW stencil. The sentiment is Hero Arts.


Its kind of hard to photograph it right, so I took three pictures.....


I am also linking this card with the Snippets Playground - used snippets only (except the card base)
Less is More - Rainbow - well - it has most colors of the rainbow...
Dream Valley challenges - no designer paper

Comments

Flo said…
Ich sage nur: grandios!!!
MRS DUCK said…
Hi Cornelia
I love the simple, fresh look to this with the great zesty colours.
Good luck with the challenge.
Ang x
Mandi said…
Super funky card

Great colours, thank you
Mandi
Susanne Vargas said…
Another one of your fun cards! The dotted stencil is a great touch!
shirley-bee said…
Great take on the sketch, Cornelia! I love how you've added the dotty stencil either side too.
Such a fun card! I love it with its warm colors and the wee dots behind it, so nice.
Chrissie said…
That's a fabulous strip across your card, looks great!
Thanks so much
Chrissie
Less is More
maria f. said…
Winner, winner, chicken dinner ;)
sandie said…
love this, so retro and funky x
Unknown said…
I always love your cards. I have a question, tho'. Was the base of the colored card not white? Or did you sponge, emboss, and then sponge some more? I'm confused why the embossed shapes aren't white. Thanks!
Hi Irene - thanks in your interest - I guess I should have mentioned it in the post, but the strip was colored to start out with, going from green to yellow to red.
Mrs A. said…
Smashing card. Love the sheen on the panel. Hugs Mrs A.
Kim Heggins said…
Fabulous card Cornelia...I love those colors. So fun!
Di said…
Great card - so striking!

Hugs

Di xx
Jean said…
I love the gorgeous colours you used and the super design. Great use of the stencil too.
Jean x
Kathyk said…
This is such a cool card - it was inspired to use those retro embossed shapes too

Kathyk
donna mikasa said…
I love the transition of color--a great take on the sketch!
Leigh Penner said…
Oh, this is wonderful! Fabulous take on the sketch!
Chrissy Larson said…
This is awesome! Love your fun funky take.
mixamatoasties said…
Funky card.

Thanks for sharing at Dream Valley this time.

Susan

Popular posts from this blog

Easter Egg and Bunny

Hi Everyone, I made a bunch of Easter cards, after all its little more than one month and I need to send them out in time... You see, they are all similar - using both the die cut and the negative, that I cut from a die cut egg. The cute bunnies got their yearly appearance - they are from Impression Obsession. the egg is by Lifestyle Crafts. The sentiment is by Papertrey. And here are bigger photos from this set: Linking up with Creative with Stamps - Easter The Paper Players - die cutting Die Cut Divas - animals Happy Little Stampers - anything goes with dies

So Suzy Stamps Snarky Blog Hop

Hi Everyone, Welcome to the So Suzy Stamps Snarky Blog Hop where funny and humorous Christmas cards take over! I am hopping along with Justine’s 12 Days of Christmas Series. If you haven’t checked it out yet, click here . Justine has been busy creating a dozen Christmas Card video tutorials to inspire you this holiday, and best of all there are prizes to be won every day. All you have to do to be eligible to win a $25 gift certificate is comment on each of the blogs! Good luck! We will pick two winners on November 9th! Here are my cards: For my first card I used a Tim Holtz embossing folder and embossed dark grey card stock. The cool deer I colored with Inktense pencils and fuzzy cut it. I stamped the Cool Yule sentiment onto aqua card stock and added white gel pen accents. Mounted everything onto a white card base. For my second card I used patterned paper as background. Added the die cuts (Santa and moose from Dixie Crafts, Winter Landscape die from Cut

Mirror Image Stamping with So Suzy and the MISTI

Hi Everyone, I am so happy to be part of this wonderful event - the collaboration between So Suzy and the MISTI from My Sweet Petunia doing mirror image stamping.  This event is going on for the ENTIRE  MONTH! We are demonstrating the  Mirror Image Stamp    which coordinates with the Misti Stamping Tool! All month long, different bloggers will post a card using the  Mirror Image Stamp .  In my tutorial today, I will show you how use the  Mirror Image Stamp  on your cards. You can basically double your stamp supplies that way! The  mirror image stamp  is  a 4.25" x 5.5" piece of red rubber with no foam backing. So much larger than the other mirror image stamps out there and therefore much more useful! Mirror Image stamp ,  Two Cats in a Tree If you want a video tutorial on how to do this I can highly recommend you watch THIS VIDEO on youtube. Explains it all in very little time! Or you can see the same thing on my photo tutorial. With mirror